*This post may contain affiliate links. As an Amazon Associate we earn from qualifying purchases.
iPhones are great for taking pictures, but unfortunately, excessive picture taking can lead to storage problems on your phone or result in many unnecessary images. Whether you want to get rid of unflattering selfies or clear up space for a new app, our article will show you how to delete photos from iPhone devices.
How to Delete Photos from iPhone in 12 Easy Steps
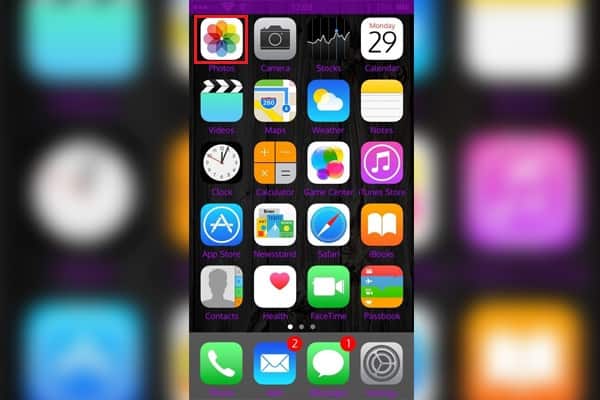
- Open the Photos app on your iPhone by tapping the rainbow flower image.
- Tap the picture or video you would like to delete if you just want to delete a single image. To delete multiple files , skip to step 5.
- Click the trash can icon.
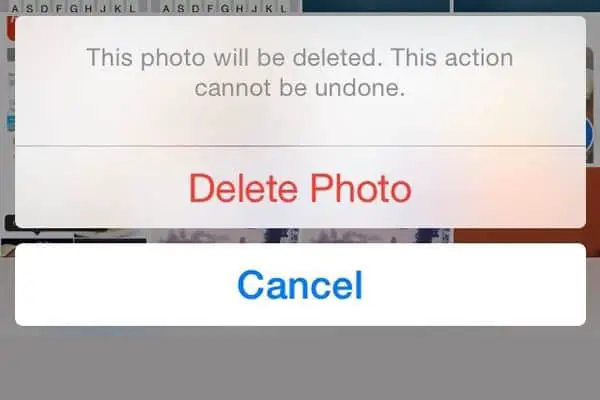
- Confirm that you would like to delete the photo.
- Tap the select button on the Photos home screen if you want to delete multiple images.
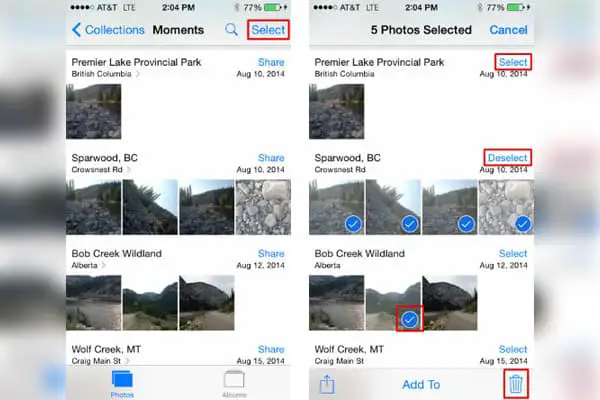
- Select each of the pictures and videos you want to remove.
- Hit the trash can icon in the bottom right hand corner.
- Click the “delete photo” button to confirm photo deletion.
- Go back to the main homepage of the Photos app and click on the Albums tab if you want to permanently get rid of your pictures immediately. Otherwise, you can just leave the delete photos in the “Recently Deleted” section for 30 days until they are automatically removed.
- Open the Recently Deleted album in the Photos app.
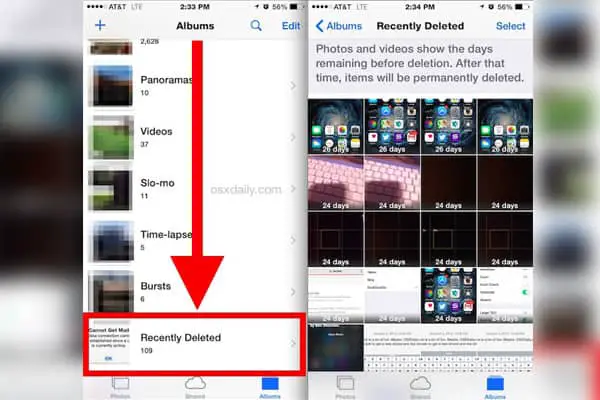
- Tap “Select” and then select each image you want to permanently remove.
- Click the delete button to immediately remove the image from your phone altogether.
When you follow these steps, you can remove unsightly or unnecessary images and boost the amount of free space left on your phone. For more assistance in removing pictures from your phone, check out the Apple Support articles or contact their customer service associates by filling out their help form.